MacDefender - info and removal

MAC-Defender.png

A program called MacDefender, MacProtector and MacSecurity has been mysteriously finding its way onto many Mac computers. The program cons the user into a paid protection subscription which does nothing.  How has this been happening? A rather malicious file called "mac-antivirus.zip" has been spreading via fairly legitimate advertising networks, including google. A download is initiated automatically via javascript to the users Downloads folder. If your Mac is set up to open downloaded files automatically... then the trouble starts.

What can you do to avoid this?

Safari's default option is to automatically 'Open "Safe" files after downloading'. This is not a good idea, it seems that OS X has troubles distinguishing safe from un-safe files.


Disable 'Open "Safe" files after downloading'.


  1. Open Safari.
  2. In the top left of the screen click the Safari menu, then Preferences.
  3. Click the General tab.
  4. Uncheck the "Open 'safe' files after downloading" option.

How do I remove MacDefender, MacProtector or MacSecurity?

  1. Open Activity Monitor located in your Applications/Utilities folder - Alternatively type "Activity Monitor" into Spotlight and hit return.
  2. Locate MacDefender, MacProtector, or MacSecurity in the Process Name column.
  3. Highlight the title then choose Quit Process from the menu bar.
  4. Next go to System Preferences/Accounts. Select your account from the left-hand column.
  5. With Login Items highlighted select the program from the list then press the '-' (minus) button.
  6. Finally check your Applications folder and drag the program into the trash can. Empty your trash can.

The excellent ClamXav virus scanner continuously updates its definitions to detect and remove these types of "scareware" programs. For more information click here.

Generally it is considered good practice to never 'click through' from unknown pop up windows that appear on your screen. And you should never make payments to an organisation unless you have instigated the transaction or it is a reputable company.

New Mac or new image? 10 things to consider doing.

Mac_Box.png

This article is perfect if you have just bought a Mac & you're unsure what to do with your new machine. Network administrators who have to create an 'image' for their company or school will also find this interesting. When you create an image which will be duplicated across 100's of machines in your organisation you need to be sure that you provide a flexible set-up that caters for every possible outcome. All of these points below should be considered when creating a clean start or image.

  1. Run System update from the Apple menu.

  2. Always set the clock so that the dividers : between the numbers flash.

    This quick trick is an easy way to see if the system has encountered an irrecoverable crash. If you're having issues & those dividers are not flashing you will have to hold down the start button until the machine shuts down. You may also wish to display the date.

  3. Remove around 3 gigs of unneeded language files fom your system.

    Monolingual is a great 3rd party tool to do this for if you are not confident doing it manually. I highly recommend monolingual, it is a free download so please check it out.

  4. Screen real estate is vital.

    Ensure that 'automatically hide and show the dock' is selected in the Dock preferences. Keeping the dock out of sight will allow 13" macbook screens to use their full 800 pixel depth all the time.

  5. Enable right click for the mouse.

    There is nothing more annoying then plugging in a mouse only to find that the 'right click' doesn't work.  It is listed as secondary click in the Mouse Preferences.

  6. Do not enable either Spaces or Expose.

    This will only lead to confusion for the user, especially if they are a beginner. Once the user becomes familiar with 'active screen corners' and why expose or Spaces will be beneficial for them allow them to enable these features.

  7. Disable Automatic Login.

    You will find this in the Accounts/Login Options, this is vital for security.

  8. Network Locations!

    Assuming that your organisation runs behind certain proxies you will need to enter those network settings to allow access. Or indeed for home users you may find yourself regularly visiting a location where you are always entering an 802.1x authentication which just don't need when accessing you home network. Create 2 different locations in the network settings menu. You can quickly swap the location from the Apple menu.

  9. Install Firefox.

    Between Fifox & Safari you should be able to render any part of the Internet correctly. Surprisingly the are many tasks which only Fifefox can perform properly online. You'll know when you'll need it.

  10. Downlaod & install Flip for Mac.

    This will allow you to run most .wma & .wmv (normally reserved for Microsoft platforms) files.  You may also want to consider installing VLC player. This way any video formats that QuickTime cannot play should be covered by VLC.

  11. Set your system Language to British or Austaralian English if needed! Check this tutorial for more on the that
  12. Click on the Finder menu & choose Preferences.

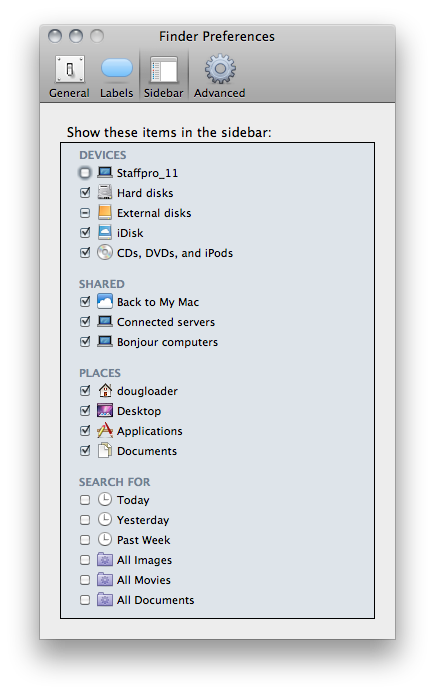
    Click the Sidebar menu. If you are just not going to be using the Mobile Me service uncheck the iDisk device.You may wish to further customise the Finder window from here.  For more on the Finder check out this article.

  13. Ensure that PDF documents are opening with Adobe Acrobat Pro (if you have it installed)

    Select a PDF document and press command I. In the information window that opens see that 'Open with' has Adobe Acrobat Pro selected. Then click 'Change all'.

Ok so I listed 13 things not 10! But please do have a look into each one of these points after you purchase a new Mac. And definitely consider all of them before rolling out a new disk image for your organisation. Have I missed anything? Please add your tips below...

The Apple Distinguished Educators Institute 2011

ADE-2011.png

A summery of the ADE Institute 2011 ANZ


The weekend brought together so many different people involved in education in Australia & New Zealand.There were teachers from all walks of life, IT engineers, principals, department officials even a Museum curator. But we also spent our time with an International Camera man, a political correspondent and an Indigenous Knowledge expert to name just a few.

The 4 days were littered with outstanding workshops. Australia's Disability Discrimination Commissioner Graeme Innes, addressed many issues but most notably the Universal Access options inside OS X. Combine these tools with keyboard shortcuts & folks of zero/low visibility can operate almost all aspects of OS X. This was reinforced by a chap called David Woodbridge who works with Apple evaluating their technology for use by low vision and blind user.

Listening to Pieter De Vries, an internationally recognised cinematographer was amazing. Being able to talk with him for 2 days afterwards was even better. His knowledge and experience were an incredible resource to ta

A very beneficial 45 minutes were spent honing our presentation skills with an expert in public speaking. The same afternoon also saw us creating epub documents and discussing the various ways they can be consumed and what their impact on education may have. Also Keynote, Garageband and Final Cut pro workshops featured heavily. Always headed up by knowledgeable Apple staff who not only lectured and showcased, but also participated in other activities throughout the weekend. This of-course included meal and drinking times, these time slots were where the real ideas were shared and debated.

My personal favourite part was talking “top secret stuff” with 3 Apple software developers, one of whom had worked on the iOS operating system. All the Apple employers were incredibly generous with their time. One in particular allowed me to quiz him for over an hour on the behaviour of Android, iOS and Windows Phone 7. If there was ever a time to get an insight into the thought that goes into the creation of a new platform this was it. Thank you Marcus for your tips and extending your knowledge and even contact details to me incase I had ‘any other questions or interesting thought.

All of these incredible talks & workshops, intertwined with fellow educators, most of whom became great friends, made for a remarkable weekend. Although I never really looked at this whole process as being a form of ‘Professional Development’ (and those 2 words were never included in any of the documentation) I must say I do feel some what developed.

What now?

Leading the change - there is no doubt that the next 6 - 12 months will see a device revolution in the classroom. Whether that be a Google platform an Apple platform or an HP platform. It doesn’t really matter which technology is used but we must first win over the support of our colleagues because it is in their hands in the classroom. If we can’t deliver the correct vision a long time before we deliver the actual product then the transition will be slow & counter productive.


Remove backgrounds easily with a hidden gem inside Keynote

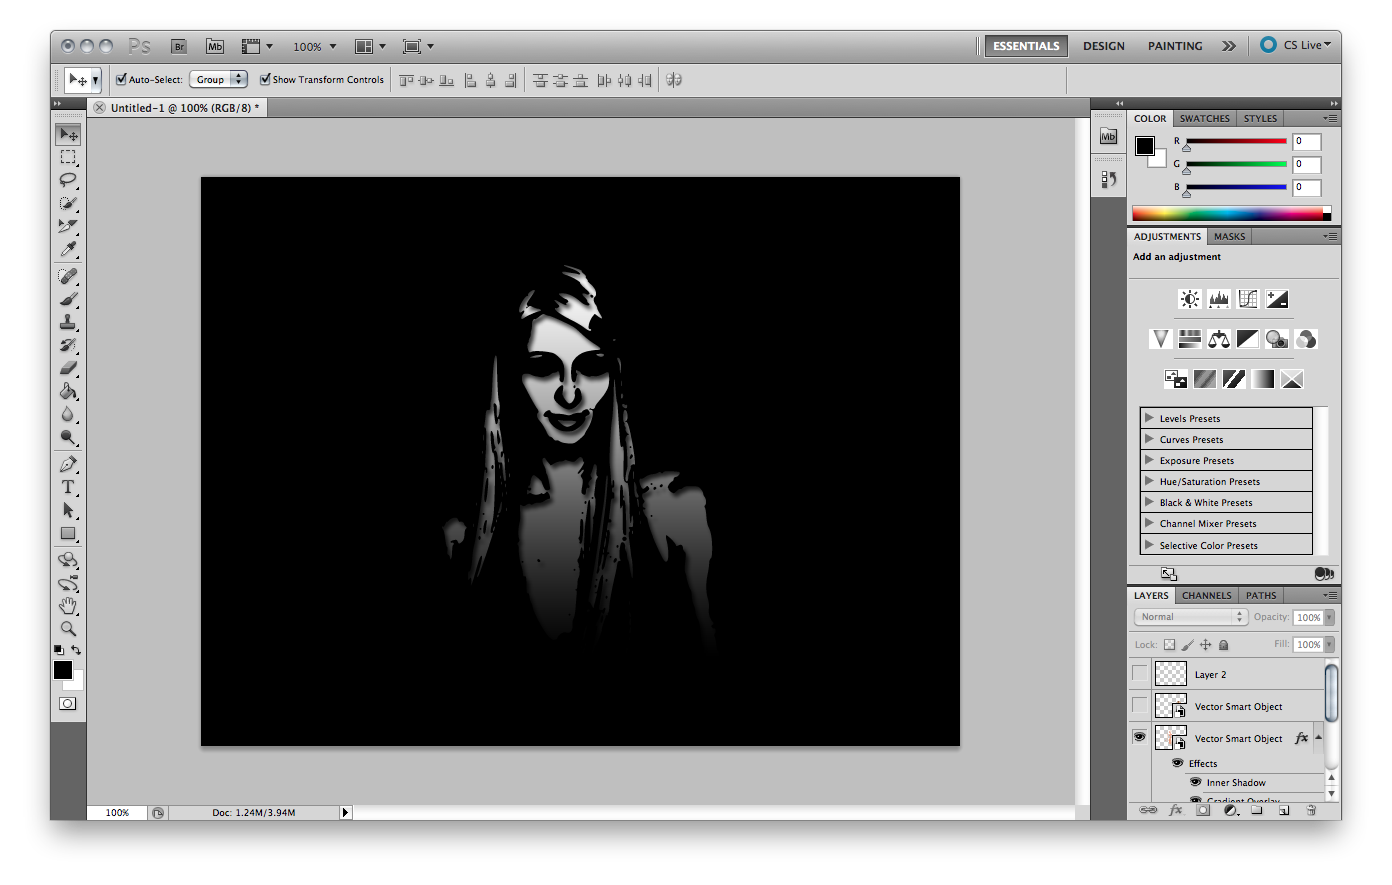
ParisHilton2.png

Often I will be sent a photograph or graphic and I need a quick solution for removing the background. My first choice would be to import the image into Photoshop. As ever with Photoshop there are a few different methods you can use to cut out the focus of the picture, but sometimes the task can be tedious and if you are not familiar with Photoshop the task can be very time consuming.

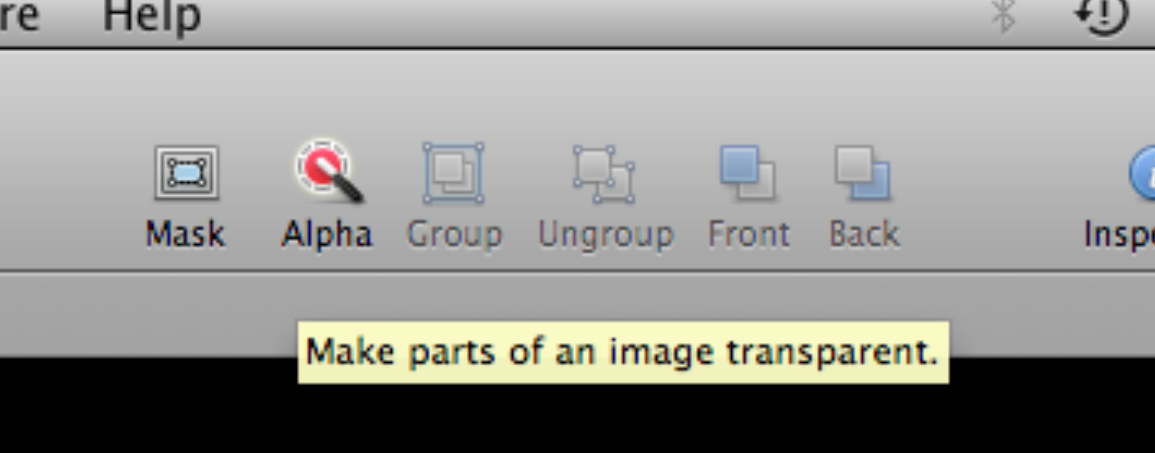
Using the Alpha Tool in Keynote, removing backgrounds can take seconds.


Keynotes Alpha tool.

  • Launch Keynote and select the black - blank template.
  • Command-a to select all of the objects on the page then delete.
  • Drag the image from your Finder onto the blank slide.
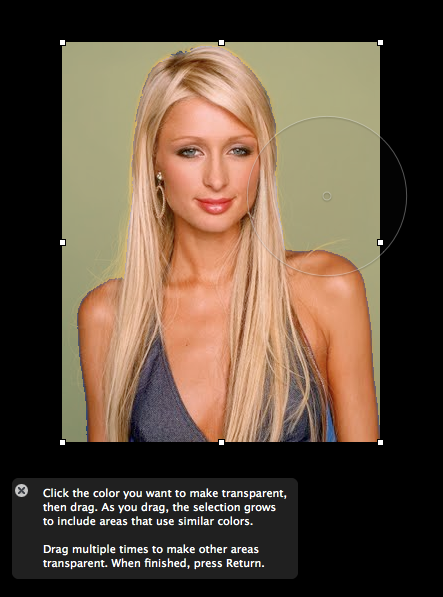
  • In my example I have a picture of Paris Hilton, this image will work perfectly due to the simple background.

  • With the picture enabled click once on the Alpha tool.
  • Move your cursor onto the blue background, click once, hold the click and expand your selection.

  • You’ll notice as you increase the diameter of the circle the blue that features in the picture is made transparent. As you drag, the selection grows to include the neighbouring area that uses similar colours.
  • So now that you have added a transparent background how can you get the picture out of Keynote and into Photoshop? Just select the picture once and press command-C.
  • Command C copies the picture including the transparent area. Now you can flick over to Photoshop create a new layer and press command-V.

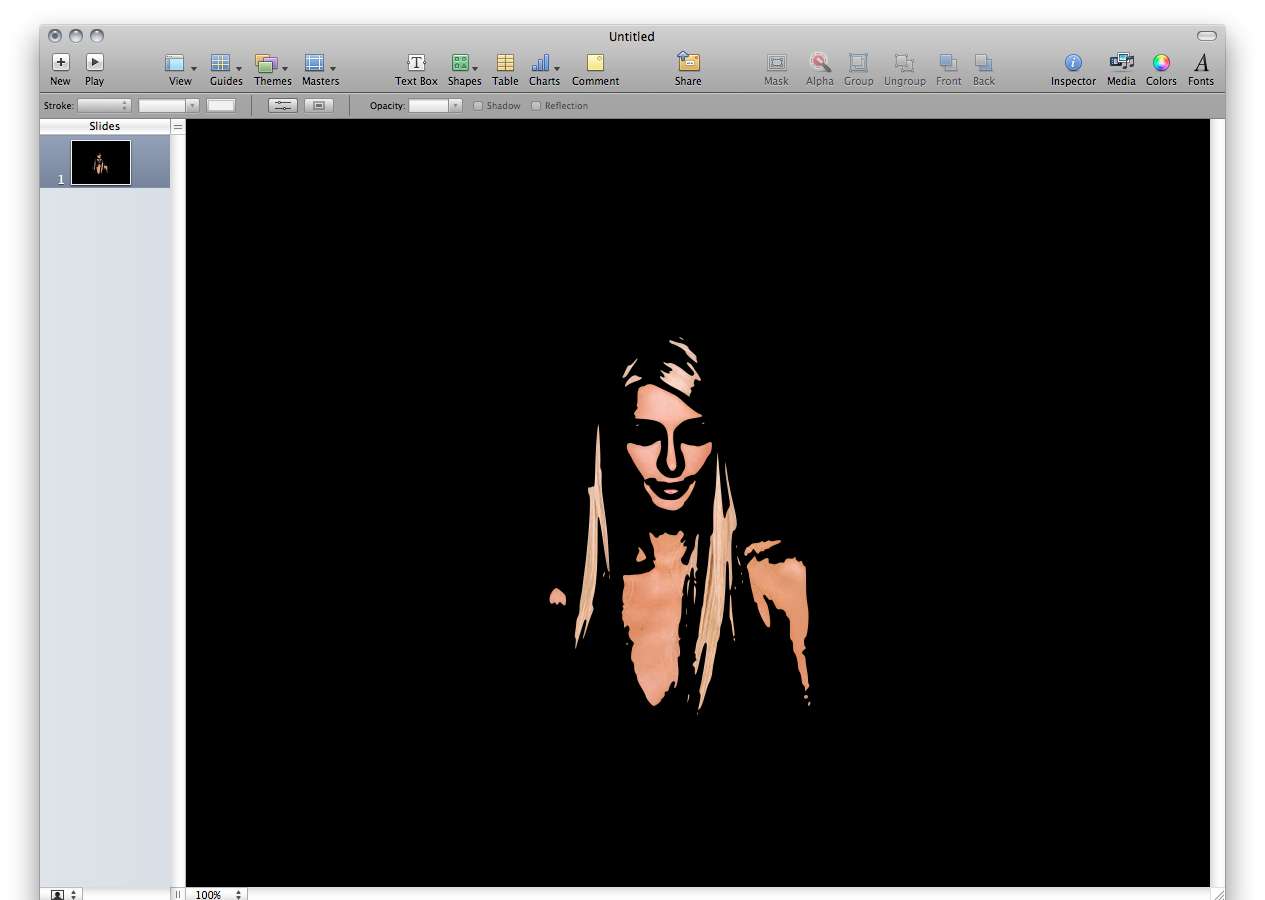
  • Try removing more than just the background and some of the effects can be very inspiring.

Hopefully you are already thinking of ways to utilise this method, for quick mock ups or short deadlines this technique has saved the day many times for me.


Word Processing basics

These notes are for young students are those who are new to word processing. Please feel free to copy these notes but please include a credit. The basics

Most students will have to teach themselves the basics of word processing, most develop some very bad habits which will permanently hinder them throughout their careers.  I would like to see more students adopting some very basic terminology and practices from an early age.  This short tutorial will look at page formatting, layout and design as well as printing and file handling.

Steps to produce a document

  • Specify the page size and orientation.  Go to File - Page Setup.  Default is A4 portrait.
  • Create
  • Save through out in a memorable place in your Home folder
  • Edit
  • Format
  • Print
  • Save (often!!)

As the content of the document is of overall importance I often encourage people to not focus on any formatting until the majority of text has been entered.  Aside from using the enter key to create new paragraphs, the student should focus on correct grammar and punctuation at this stage.


After a document is written and edited you may wish to experiment with fonts.  A document at this level should not consist of more than 2 fonts.  However the student may want to incorporate the use of italics and bold typeface to quote or highlight certain text.


A document will generally have 3 text elements which you may use different fonts and/or weight (bold):

  1. The Body text.  Your paragraphs will be full of Body text.
  2. The Heading text.  Used to highlight text or add new sub headings.
  3. The Title text.  Used for new sections and titles.

Lists should also be mentioned here, offering the use of bullets or numbered lists.  As used below for a list of some basic terminology (after an invisible page break has been inserted here).

Basic terminology

  • Cursor - symbol for where text will appear
  • Edit - make changes
  • Cut - remove selection from document and store temporarily on the Clipboard, which is a section of computer memory.  Generally you can only store one thing at a time
  • Copy - duplicate selection onto Clipboard
  • Paste - place contents of the Clipboard at cursor location
  • Undo - reverses whatever change you just made
  • Insert - add text at location without overwriting existing text
  • Delete - remove text (not saved anywhere)
  • Search - look for specific word(s) or character(s)
  • Replace - can replace specific word(s) or character(s) with stated text
  • Template - a document that serves as a pattern for a new document
  • Thesaurus - looks for synonyms for selected word
  • Spelling check - looks for spelling errors
  • Grammar check - looks for grammar/style errors (of limited help)


Printing

A decision should be early on if  you need your document printed on paper size any different to A4.  Your word processor will not automatically convert your document to a new page size if you change your mind later on.  Select File - Page setup to adjust paper size and orientation.

Saving

As soon as you start you first sentence please select File - Save.  The first time you do this you will be presented with the ‘save as’ dialogue box.  Please choose a relevant place inside your Home folder to keep the document.  Use cmd-S every time you take a pause to save the document as the Apple Mac does not do this for you!

Headers and footers

Headers and footers are repeated across each page in your document.  You can Insert date, page numbers, the file name or a personal message into your headers and footers.

Margins and columns

By default your margins are set to 2cms.  Please have a look in the Inspector Window.  The first category is the Document Inspector.

Please familiarise yourself with the properties on this page and see how the page has been laid out for you.  Agin this is all standard layout for word processors.

Spell check tips

When a word is misspelt it will be underlined in a red line.  If you right-click the word spelling suggestions will be revealed.

  • Another great tip is to hover your mouse pointer over a word, and press ctl-cmd-d.  Keep the ctl and cmd key held down.  Move the mouse over other words and you will have a constant window open showing you a dictionary definition and thesaurus entry.

The correct use of text boxes

Generally I would recommend against using text boxes.  Text boxes are quick solution to placing text and pictures onto the page exactly where you need them.  However it is better to master the use of using the return key and a combination of line spacing and paragraph spacing first.  Text boxes are objects on your page which can be customised with colour backgrounds and picture backgrounds, as well as line strokes and picture frames.

Inserting pictures and wraps

The best method to inserting pictures is to position the cursor where you would like the file (or picture) to be.  Then select Insert - Choose from the top menu.  Select the picture from your home folder (or where ever it may be) and the picture will be placed in position on the page.  The picture is placed ‘Inline‘ meaning it behave just like any other letter in your document.  You can adjust the size of the picture by pulling the small square handles at the pictures edge.  Once the picture is the correct size please experiment with the way the text wraps around the picture.

 

The Finder, an introduction

This tutorial covers the absolute basics with a fundamental part of your Mac. I recommend that you check this article out as it could be the most important tip of them all! Think of the Finder as your window into OS X (Operating System 10). The Finder is an application which runs constantly. It’s fair to say that the Finder is your desktop image and the files/folders which reside on your desktop. The Finder also handles your trash.

But most importantly the Finder is the Finder window.

  1. Click once on your desktop, this activates the Finder. You will notice that the ‘Finder’ menu is displayed in the top left. Notice in the menu you have Finder Preferences, another clue that this is just another application
  2. Press command-N. This is a shortcut think of N for New.
  3. Now we can see our Finder window.

Familiarise yourself with this Finder window.


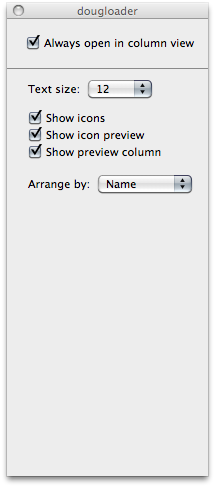
  1. There are 4 different ways that you can navigate the Finder. My personal preference is the column view, I always recommend this to students and teachers as it makes most logical sense to me. Now control-click the Finder window and choose Show View Options. Check always open in column view.
  2. Control-click on the title of your Finder window. This displays the absolute location with your computer.
  3. Always store your personal files within your own Home Folder. If you ever migrate to a new Mac or need to grab all your personal files quickly you’ll be glad you did! Your iTunes music collection and your iPhoto picture collection are kept safely in your Home Folder, as are your emails no matter which client you use.
  4. Notice your Desktop Folder in your Home Folder. Also notice the Applications Folder. Its empty right! That’s ok, your system has another Applications Folder stored right at the top level of your Macintosh HD. That way more than 1 user can share the same applications on the Mac. Sometimes you might want to install an application in your own Home Folder/Applications, that way the Application is private and exclusively yours.


My Finder window is small! Its missing the Sidebar!

  1. If you cannot see the whole Finder window just click the top right grey button. This will reveal or hide the sidebar.
  2. Also control-click the sidebar itself. Open Sidebar preferences. Here you can customise the look and feel of the Finder. Don’t use the ‘Search For’ smart folders? Get rid of them here.


How do I create and colour folders?


  1. To create a folder simply control-click in the location you need the folder to be. Choose new folder. Right click that folder and select a label colour.
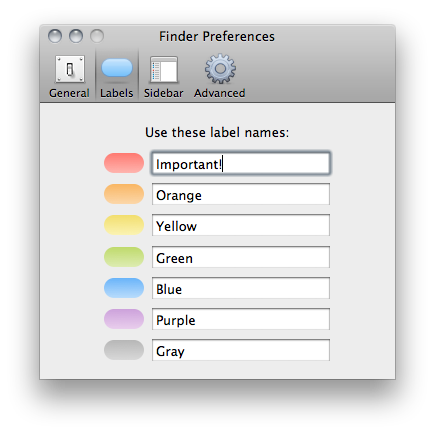
  2. In the Finder Preferences you can also change the name of the folder labels.


Organise files with Smart Folders

Smart Folders allows you to organise files which have something in common.

  1. Select File>New Smart Folder.
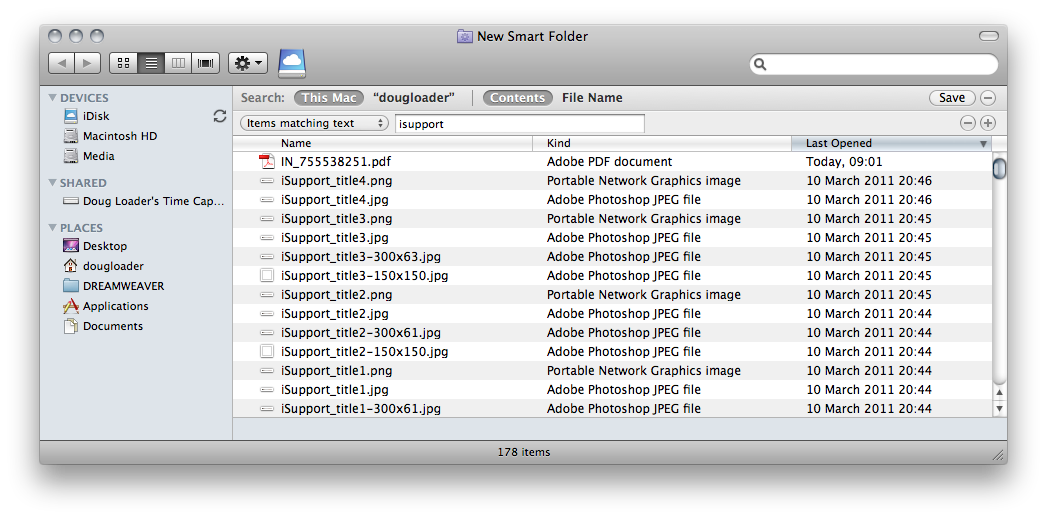
  2. Now type a search criteria in the search field. In my example I’ve typed isupport.
  3. If I save this search and attach it to the sidebar, even new files that I save in any location on my hard drive will be added to this folder. Its worth noting though the files are not duplicated into this folder, you can simply see the original file from this new location.


Launching applications and finding files with Spotlight

Spotlight is an extremely powerful search tool for your Mac. Use it just once to launch an application and you’ll begin to realise how this feature can save you stacks of time.

  1. Press the command and space bar keys. You’ll notice Spotlight is activated in the top right of your screen.
  2. Type the letters ‘ITU’. You’ll see the top hit highlighted in blue is iTunes.
  3. Hit return and iTunes launches.

If you are servicing another persons Mac or need to open a Utility you don’t often use, Spotlight is an extremely quick alternative to scanning through the Application folder. Try it a few times and i’m sure you’ll be hooked!


Quickview

  1. Select a file or folder anywhere on your Mac and press the space bar.

This works with spreadsheets, pdf's, even presentation files. What a time saver!


I hope that you found these simple notes helpful. If you get your head around the Finder early on and organise and structure your file system from early on, it will seriously pay off in the future.
 

Setting your OS X System Language correctly

Do you ever find your Mac wrongly trying to correct your spelling?  A common example of this would be words such as 'organisation' wanting to be spelt with a 'z'.  Or of course colour, analyse, and fibre all having American variants.  This can be very distracting when creating beautiful page layouts when all you can see is squiggly red lines underlining everything. This is a problem for any English speaking country that is not America.  And it is no surprise that your Mac has been set up with "American English" as a standard (We'll later find that American English is listed as just English).  Which perhaps should not be the case seeming as Canadian and Australian English largely follow British usage.

Well here is how you can set your system language to suit your country of residence so that you can always get it right.

  1. Your first step is to head to your System Preferences (Applications > System Preferences).
  2. Click on 'Language & Text' where we can specify exactly the variation of English we require.

    Language and Text preferences OS X

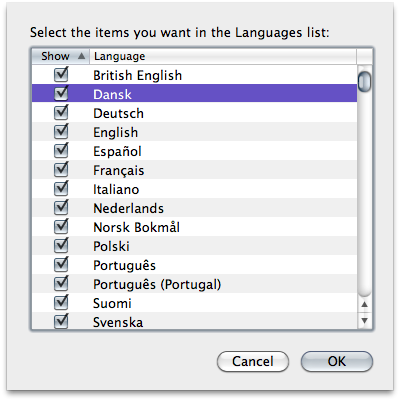
  3. Drag Languages into order you prefer?  Well English is already at the top, this is in fact American English.  You'll need to locate British, Canadian or Australian English yourself.
  4. Click on Edit List... and here you will find many different languages hidden away.  Scroll through the list and check the box next to the language you need.
  5. Lastly make sure that you drag your preferred language to the top of the list.  If an application supports the first language in the list, its menus and dialogs will appear in that language. If it doesn’t support the first language, it will use the second language in the list, and so forth.

Once you log back in changes take effect.

Do I need anti-virus protection for my Mac?

Personally speaking I have never run any form of anti-virus protection on my Mac for home use. But then I never run 'dubious' software (such as bit torrent clients or cracked software) on my machine.Also I consider myself to wise to the ways of 'phishing'. If you keep your software up to date and back up your important data I see no reason for an average sensible home user to run anti-virus protection. Often you will find that these virus protection programs can be 'system hogs' and they will capitalise on a lot of your systems valuable CPU. However, if you are a business user or your Mac may be an attractive target for hacking or phishing then I would recommend that you err on the side of caution.

Any free anti-virus tools I can use?

The most popular free tool appears to be ClamXav. If you are running a large network for business I would recommend something more comprehensive from either Mcafee or Norton.

Keynote inspiration! Animated lines

In this Keynote tutorial learn a nice tip to animate your lines as if they were drawing themselves !!! ;)We always try to encourage our students to think 'outside the box' and this video shows how layering objects can create a very cool effect. And remember this effect is not standard in Keynote

[youtube http://www.youtube.com/watch?v=sBbQc164I3U]


Downloading YouTube clips

This has to be one of the most common questions that students (and teachers) ask me. And it can be a tricky one to answer. The legalities around ownership of these videos is a consideration, and is it right to download YouTube clips to be used in your own presentations or assignments. Well the discussion usually ends up on "if its on YouTube... it's gotta be fair game... right?". Well my job isn't to judge, just to assist, so here goes Use Firefox so that we can expand it with the 'Add Ons'

  1. Launch Firefox and simply Google 'add ons'
  2. Your top result will be our destination - Add Ons for Firefox
  3. This will take you to the Firefox add on search tool.  Simply search for YouTube.
  4. Now, scroll down the results until you find the most popular "YouTube download"  add on.  This will most likely be the most stable add on.
  5. Then all you need to do is click 'Add to Firefox'
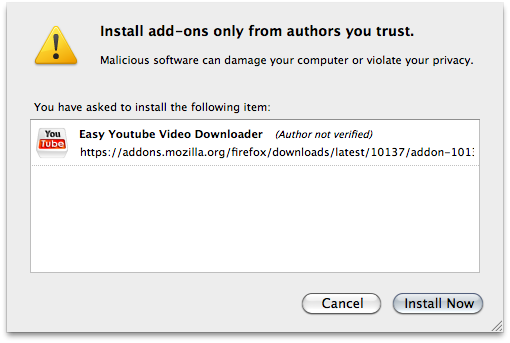
  6. A warning window will pop up but just click 'Instal Now'.
  7. Now just restart Firefox and navigate to YouTube.
  8. It is here where you will see the difference, just have a close look below the video which you are after and a new option has appeared 'Download As:'
  9. MP4's work best in a Mac environment.  And don't forget to credit your source when you use the video!

Keynote - Getting started

Keynote is a very powerful application from Apple's iWork suite. In this getting started video I've provided a link so that you can download the actual keynote file that I use in this tutorial. So grab a coffee and work along with me.

  1. Click here to get that Keynote file.
  2. Watch the video below!

[youtube http://www.youtube.com/watch?v=6eV7rT9uYZI]


iPhoto - the basics

This video really does cover the absolute basics of importing and handling pictures inside iPhoto. A tutorial aimed at absolute beginners. One thing I would say is forget those habits from using Windows! Don't go rooting around in your pictures folder if you are looking for a photo. Use iPhoto for emailing, exporting pictures to disk everything If you really want to get your hands on the actual file itself.

  1. Highlight the picture that you want and then choose File>Export.

[youtube http://www.youtube.com/watch?v=rpz0b21H65s]